Last week we posted about Outernet’s new Dreamcatcher unit which is an RTL-SDR + L-band LNA + computing board all on the same PCB. The Dreamcatcher comes with a new active ceramic L-band patch antenna, costs $99 USD (plus shipping) and can be bought directly from their store. Outernet were kind enough to send us a review unit, and we’ve been testing it for the past few weeks. This post is a review of the unit.
Background
Outernet is a free data service that uses L-band satellites to beam down information like news, weather updates, Wikipedia articles, books and more.
In the past Outernet have used the $9 USD C.H.I.P computing board, an RTL-SDR dongle and an external LNA as the receiving hardware for their data service. However, popularity of the Outernet service has been severely hindered by the huge supply shortages of the C.H.I.P. Over the past year or so it has been almost impossible to get a hold of a C.H.I.P unit if you did not back the Kickstarter or buy one from Outernet’s first initial stock. By manufacturing their own PCB including the computing hardware, Outernet must be hoping to be able to control their stock situation, and not rely on third parties who may not be able to deliver.
At the moment the Dreamcatcher can only be run on their new Armbian image. The older Skylark image has been removed from their servers presumably because the Outernet signal is going to change in the near future and the old demodulator on Skylark may no longer work. The Armbian image is basically just standard Armbian and at the moment does not actually run any Outernet software, and cannot decode their signal, but this is being worked on. Eventually they hope to replace Skylark with a standard decoding app that runs on Armbian.
In this post we’ll review the Dreamcatcher with Armbian and consider it as a general purpose receiver (not just for Outernet), and we’ll also review the new active ceramic patch antenna as well.
Dreamcatcher Overview
The Dreamcatcher is a single PCB that combines an RTL-SDR, Linux (Armbian) based computing hardware, and an L-band LNA and filter.
On first impressions we noticed that the PCB is relatively large square at about 12 cm by 12 cm. The most prominent chip is the Allwinner A13 SoC. The RTL-SDR circuitry is positioned in the upper right with the RF sections (R820T and LNA) both covered with RF shielding cans. There is no onboard WiFi circuitry, but a small ‘EDUP’ branded WiFi dongle is included and plugs into one of the USB ports on the PCB.
We measured the Dreamcatcher to be using about 400 mA – 600 mA while idle and 800 mA while utilizing the RTL-SDR and 100% CPU. Heat is not an issue as the Dreamcatcher stays relatively cool during its operation even at 100% CPU with the CPU only getting up to about 45 degrees C.


Computing and Ports
The Dreamcatcher uses an AllWinner A13 System on Chip (SoC). Inside the AllWinner A13 is a single core ARM Cortex A8 CPU @ 1 GHz. The hardware is very similar to the hardware used on the C.H.I.P. Onboard the PCB is 512 MB of RAM, and there no onboard flash so everything is stored on an SD card.
There is space for two SD card slots on the board. One SD card is used for the Armbian Linux image, and the other can be used for data storage. There are also three USB-A ports available, but one is used up by the included WiFi dongle. There is one micro USB port for USB OTG and the another for power only. The USB OTG port can be used for the initial setup of the board, before it is connected to WiFi.
There are also audio and microphone input jacks available, breakout expansion pads for advanced users and some power/reset and boot setting switches.
RF Hardware
On board the PCB is circuitry for a single R820T2 based RTL-SDR with 1PPM TCXO. There are two SMA RF ports. One port is connected to the L-band LNA and filter which is to be used for Outernet or other L-band satellite reception with a passive patch antenna. The L-band port uses a 34dB gain LNA with L-band filter with a pass band of 1525 – 1559 MHz.
The other SMA port bypasses the LNA + filter so that the Dreamcatcher can be used as a general purpose RTL-SDR as well. A software controllable silicon switch is used to bypass the LNA + filter, so only one port can be used at a time. The bypass port also has a software switchable 4.8V bias tee which can be used to power the new active ceramic patch antenna from Outernet.
Dreamcatcher Setup
Setting up the Dreamcatcher involves burning their latest Dreamcatcher Armbian image to a microSD card, inserting the card, and then completing the setup via the UART connection. The full setup instructions are detailed in the image readme.txt file and in their operating manual available here. Various code snippets that show how to turn on the bias tee for example can be found here.
The full setup might take about 10 – 15 minutes, including burning the SD card. Once setup the Dreamcatcher should be connected to your WiFi connection, and then if you prefer you can SSH into it from a PC on your network using PuTTY or any other SSH software.
There are two ways to set up the UART connection on the Dreamcatcher. The first is to use the USB OTG port, and the second is to use a $1-$2 USB to UART adapter. The easiest is to use the USB OTG connection. To use it fist burn the image to an SD card, and then connect a USB cable from the USB OTG port on the Dreamcatcher to a USB port on your PC. The Dreamcatcher will be powered through the OTG port, and once the Dreamcatcher boots it will show up as a serial port on your PC. Now you can use a program like PuTTY to connect to that serial port.
The steps for using PuTTY to connect to the board are shown below.
- Connect your USB to UART adapter to the UART1 pins, or the USB OTG port to your PC with a cable. If using USB OTG power the unit on now.
- Now determine the COM port that you’re USB to UART adapter or USB OTG cable has been assigned by looking for the device in Device Manager.
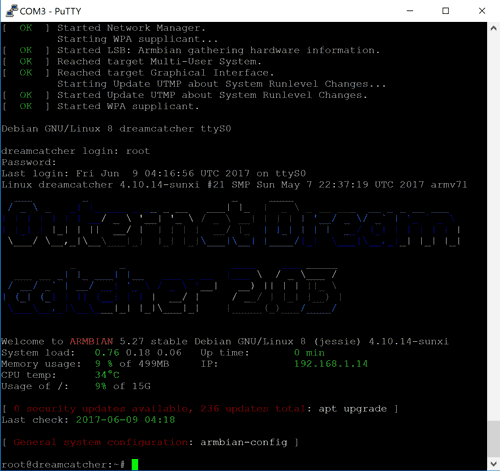
- Next in PuTTY choose “Serial”, enter the assigned COM port and set the baud rate to 115200. Then click Connect.
- If using USB OTG the login prompt will now show. If using the UART adapter you can power up your Dreamcatcher and text should immediately begin scrolling in PuTTY. Wait for it to boot and reach the login prompt.
Now follow the instructions in the readme.txt file to setup the user accounts, and connect to WiFi.
The Outernet Armbian image comes with no software preinstalled, so after you login you’ll need to install the RTL-SDR drivers, and whatever software you want to run on it.
Dreamcatcher Testing
Basic Software
First we tested the Dreamcatcher with some simple software like rtl_adsb which is automatically installed during the RTL-SDR install process. The first step was to connect an antenna to the LNA_bypass port. The bypass port is enabled by default, so no extra commands are needed to enable it. rtl_adsb was able to pick up aircraft with no problems.
Next we installed dump1090 and repeated the test. Again planes were picked up with no trouble. We also tested the dump1090 webserver, and we were easily able to connect to it from a networked PC.
Next we tested rtl_fm to see if we could get some audio out of the headphone jack. First we had to install sox with ‘apt-get install sox’. Then by default the volume is muted and turned down to zero so to unmute it, type in ‘alsamixer’. Use the arrow keys and the ‘m’ key to select all the devices and unmute them. Also turn up the volume on the power amplifier. With the sound unmuted rtl_fm ran well and could drive a speaker fairly loudly. The command we used was ‘rtl_fm -M wbfm -f 89.1M | play -r 32k -t raw -e s -b 16 -c 1 -V1 -‘
We also tested other software like rtl_433 which had no trouble running.
Currently Outernet have set up Howto’s for several applications including ADS-B, listening to FM broadcasts, setting up an APRS iGate, setting up Tight VNC which allows a networked graphical display, setting up YAAC APRS on Tight VNC, setting up WSPR reception, and using rtl_power for wideband spectrum analysis.
GR-Iridium & L-Band
We also tested gr-iridium on the Dreamcatcher which is software that allows you to listen to L-Band Iridium satellite phone calls and data. To actually get it to install we had to first set the Armbian package manager from Jessie to Stretch. This allowed us to download and install the latest version of GNU Radio from apt-get which is required for installing gr-iridium.
For reception we couldn’t use the new ceramic patch antenna because the SAW filter cut off is 1559 MHz and Iridium is at around 1625 MHz. Instead we used an LNA4ALL and the older Outernet metal patch antenna. We also tested the metal patch antenna with the onboard L-band LNA and this worked as well, although this is more difficult to use as a longer extension coax cable can’t be used unless you want lots of signal loss (since the LNA is not near the antenna). Iridium signals are often strong enough to be picked up even with a simple dipole, so that could work too if you can’t obtain a patch antenna.
We were able to get gr-iridium to run at 1 MSPS, but we ran into CPU limitations at anything higher which is unfortunate as gr-iridium really needs the bandwidth to cover as much of the Iridium band as possible. However, even with only 1MSPS we were able to receive and decode a very short 2 second call.
Unfortunately there is no software available for the Outernet signal or Inmarsat signals at the moment on Armbian, so we were unable to test these signals. Also JAERO for AERO signals is available for openSUSE 42.3, but not yet available on Debian systems. If anyone knows of any other Linux compatible L-band signal decoders please let us know in the comments. Outernet are planning to release an Armbian based decoder for their satellite service in the future.
Radio Data Streaming Software
Unfortunately, we started to run into some trouble when it came to running RTL-SDR streaming server software like rtl_tcp, SpyServer and OpenWebRX. In short none of those would work very well by default, however some tweaks were able to improve the situation.
With rtl_tcp we were only able to achieve stutter free operation at a 0.25 MSPS data rate. In comparison a Raspberry Pi 3 connected to the same WiFi network was able to easily handle at least 1 MSPS. It turns out that the ‘EDUP’ WiFi dongle that is included with the Dreamcatcher is quite slow, despite supporting 802.11n. Changing to a higher quality WiFi dongle allowed us to stream smoothly at 1 MSPS. The Outernet team have also reported to us that using an Ethernet adapter allows smooth streaming at 2.4 MSPS.
Next we tried the new SpyServer streaming software which is designed for Airspy SDRs, but also works with RTL-SDRs. The first problem we ran into was that the public SpyServer download did not run on the Dreamcatcher. We had to ask the SpyServer developer for a special version that was compiled for older CPUs. Once running SpyServer we sadly found that it would not run smoothly at any sample rate, with or without full IQ used. SpyServer uses less bandwidth compared to rtl_tcp, but here the problem was high CPU usage. The SpyServer does a lot of computations on the server side so the CPU usage is quite high. Unfortunately the CPU on the Allwinner A13 seems to be not powerful enough to run SpyServer.
We also tried OpenWebRX which is used for efficient remote streaming. See sdr.hu for various OpenWebRX SDRs shared on the internet. To save bandwidth OpenWebRX only sends waterfall data and compressed audio instead of full IQ data. But even at 0.25 MSPS the Dreamcatcher’s CPU struggled and was stuck at 100% CPU usage using the default config file. After tweaking the config file a little we were able to achieve smooth results at 1 MSPS, but only for one connection. Andras, the creator of OpenWebRX is working on some code optimizations for the Dreamcatcher which may improve performance in the future.
We think OpenWebRX might have trouble running on the Dreamcatcher’s Cortex A8 as it is a single core CPU, and OpenWebRX runs several threads. In comparison a Raspberry Pi 3 ran OpenWebRX easily and total CPU usage remained under 50%. This is because the Pi3 has a Cortex A53 @ 1.2 GHz, which is a 4 core CPU.
To get a handle on the CPU performance differences between the Pi 3 and Dreamcatcher CPU’s we ran sysbench on single thread, and on 4 thread mode using: ‘sysbench –test=cpu run’ and ‘sysbench –test=cpu –num-threads=4 run’.
- Sysbench Dreamcatcher (1 Thread) – 286.584s
- Sysbench Dreamcatcher (4 Threads) – 286.8299s
- Sysbench RPi3 (1 Thread) – 182.3092s
- Sysbench RPi3 (4 Threads) – 45.7500s
Sysbench shows that the Pi 3 is quite a bit faster, especially if all four cores can be utilized.
The Ceramic Active Patch Antenna
We also tested Outernet’s latest iteration of their L-band patch antenna. This new patch antenna uses a ceramic dielectric instead of an air gap which was used on their previous metal patch antenna. These ceramic patches are similar to the ones used in small GPS antennas, but larger.
The new patch antenna is also ‘active’, meaning that it has built into it a low noise amplifier (LNA) which must be powered via a 3-5V bias tee. The Dreamcatcher RF_bypass port has the required 4.8V bias tee to make it run. An L-band SAW filter is also built into the circuit and we assume the pass range (1525 – 1559 MHz) is the same as the filter used on the Dreamcatcher L-band port.
This new active patch antenna is a good idea as it allows you to use a run of a few meters of coax cable to get the antenna outside and into a good position where it can see the satellite.
We compared the new active ceramic patch with the previous metal patch + Outernet LNA combo using an RTL-SDR Blog V3 dongle with the bias tee powering the LNAs on both antennas. Signal levels were about 1-2 dB’s lower on the ceramic antenna, but we observed that the ceramic patch was slightly less directional and easier to point. We also tested with 2.5 meters of thin lossy RG174 coax and didn’t notice any loss in SNR. The LNA helps to boost the signal, so that signal losses in the coax are negligible.
Again, one issue with these antennas is that they have no mounting solution so we simply glued a 1/4 inch female thread onto the back of the PCB, and then used a standard camera suction cup to mount it on a window with a good view of the Inmarsat satellite. The antenna circuitry on the back is also not waterproof, so to waterproof the antenna it was later covered with a plastic sandwich bag. People who want to mount it more permanently might consider using a plastic lunchbox or other sturdier solution.


Conclusion
So is the Dreamcatcher worth it? For $99 USD (plus shipping) about you’re getting a fully assembled compute board with RTL-SDR and L-Band LNA+filter module built in, as well as an active ceramic antenna. It is the first computing board that we know of that includes an RTL-SDR on the PCB itself. In the past projects like the XiOne attempted something similar, but never got off the ground.
Consider that a Raspberry Pi 3 costs $35, an RTL-SDR capable of receiving L-band like the V3 costs $20 and an Nooelec/Outernet L-Band LNA+SAW filter module costs $17.95. The Outernet metal patch antenna no longer seems to be for sale but that used to cost $25. The total price of those individual components adds up to $97.95 USD.
The Dreamcatcher is still a bit buggy, with problems regarding the streaming server RTL-SDR apps. And compared to the Pi 3 the CPU performance is quite a bit less, meaning that high CPU use software like OpenWebRX does not function that well. But regular apps that can run on the device like dump1090, rtl_433 etc all run just fine. In the future we’d like to see a more powerful CPU used as this would allow several more applications to run smoothly on the board.
In terms of product maturity, Outernet have put up a warning for potential buyers on their store which notes that the Dreamcatcher is “only for tinkerers, hobbyists and hardware hackers”, and that “no direct support for it is provided”. The most assistance available will be on their forums. To actually use the board you will need a decent understanding of Linux (being able to install and run software from the terminal), and preferably you’d need some previous experience with other small computing boards like the Raspberry Pi.
All in all the Dreamcatcher is a great buy for someone looking to get an all-in-one device, but it is still more suited to advanced experimenters. Hopefully the board soon matures, and we start to see actual Outernet apps appearing, as well as potential upgrades to the hardware as this will push the value of the board up significantly.